Hardware guide / sharpa
Sharpa setup on Franka
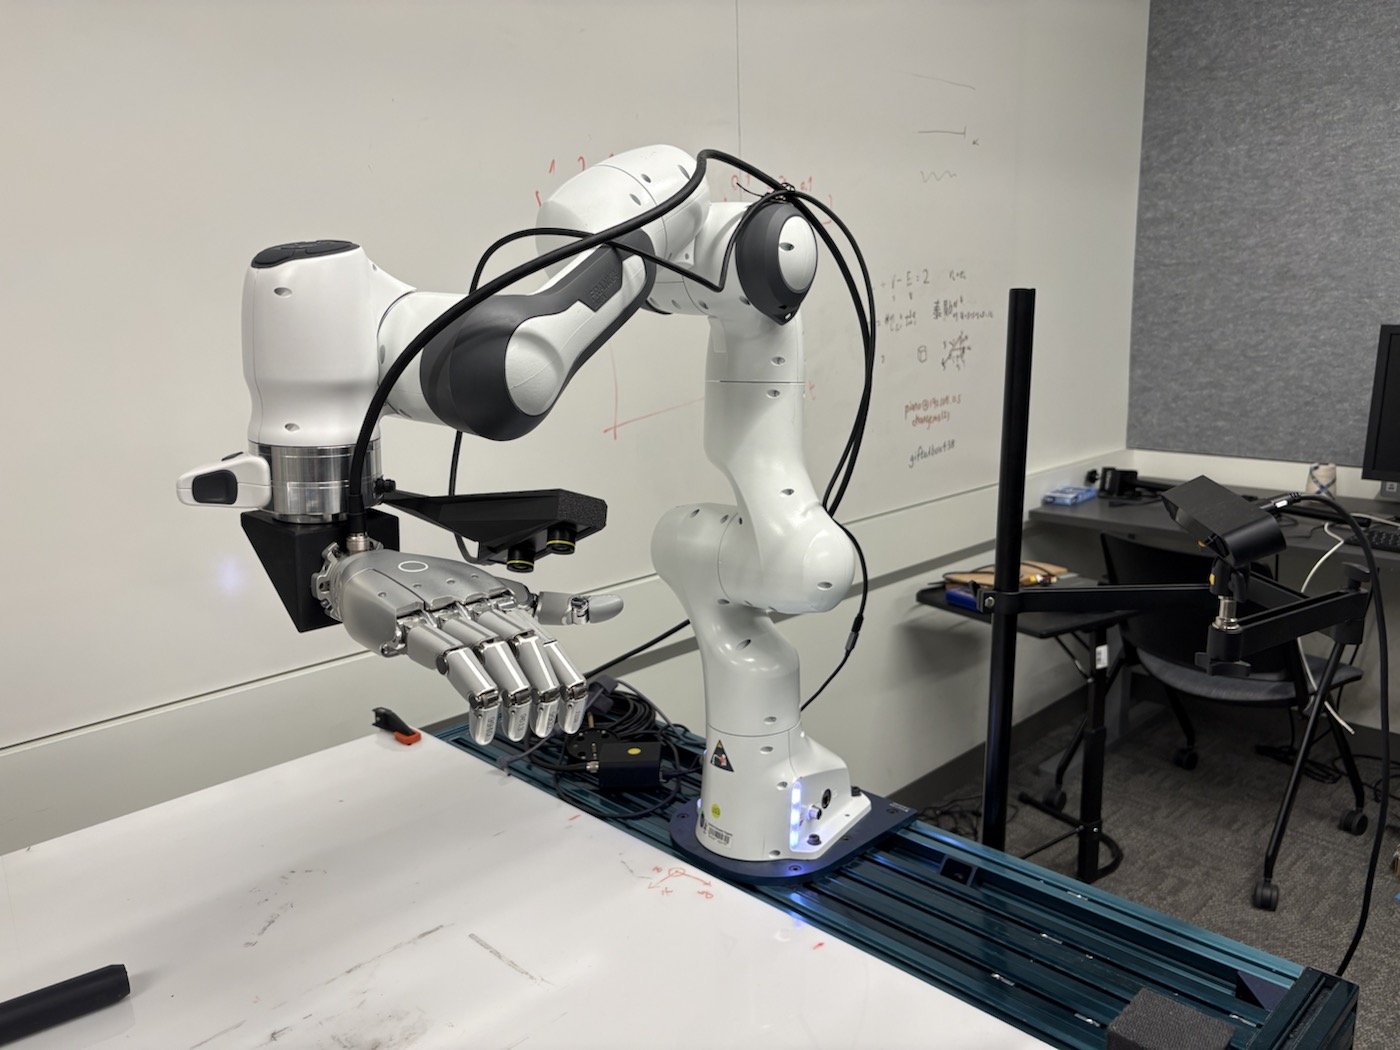
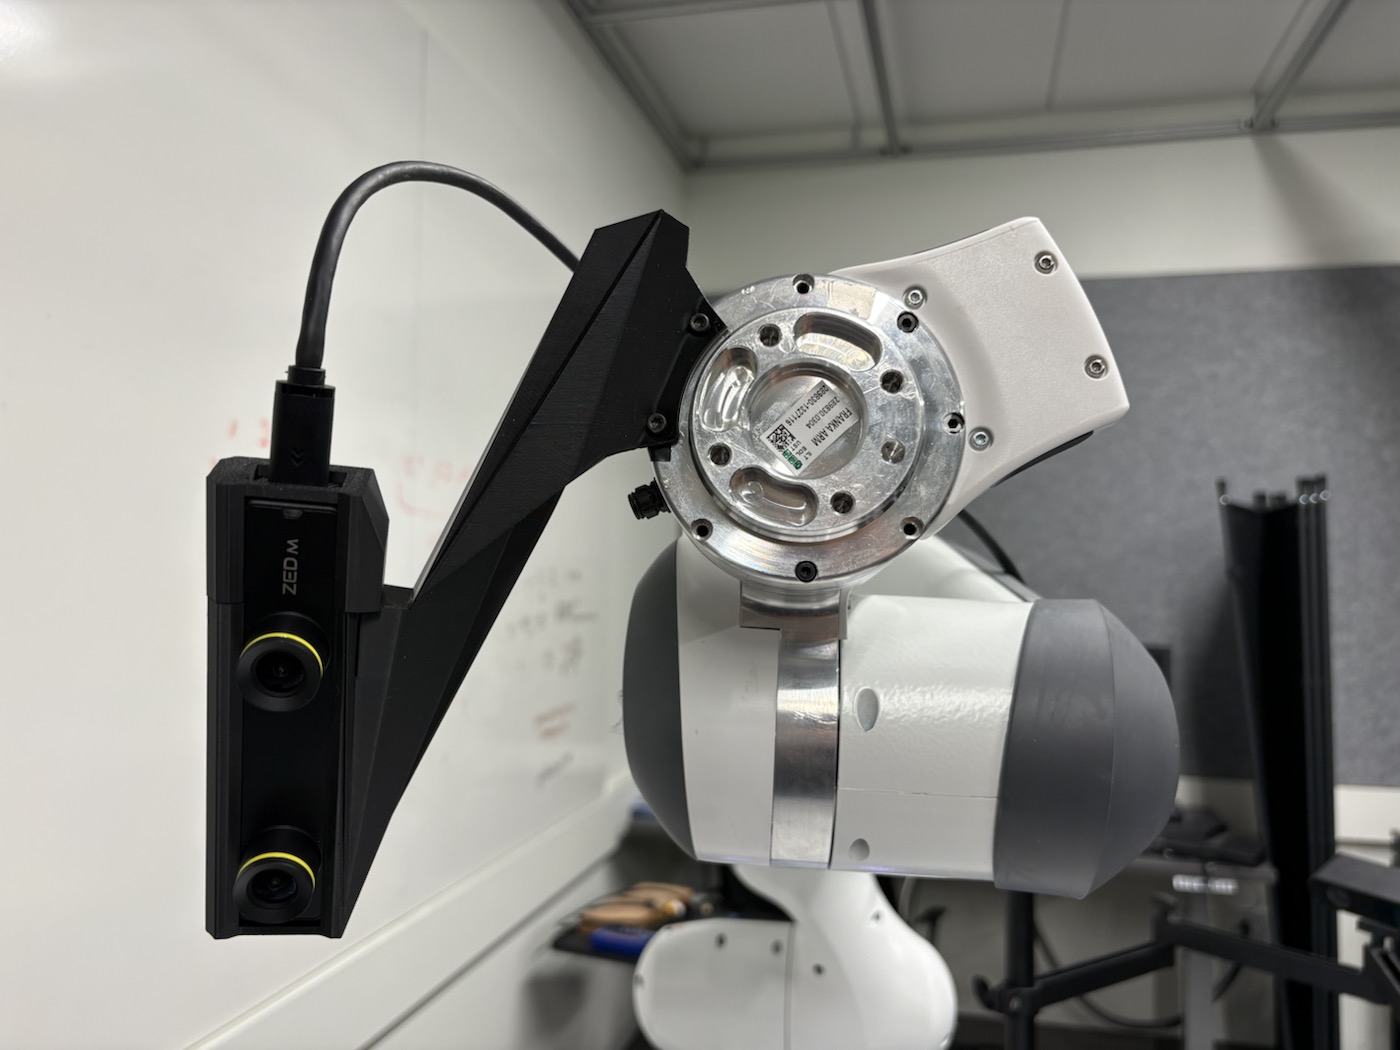
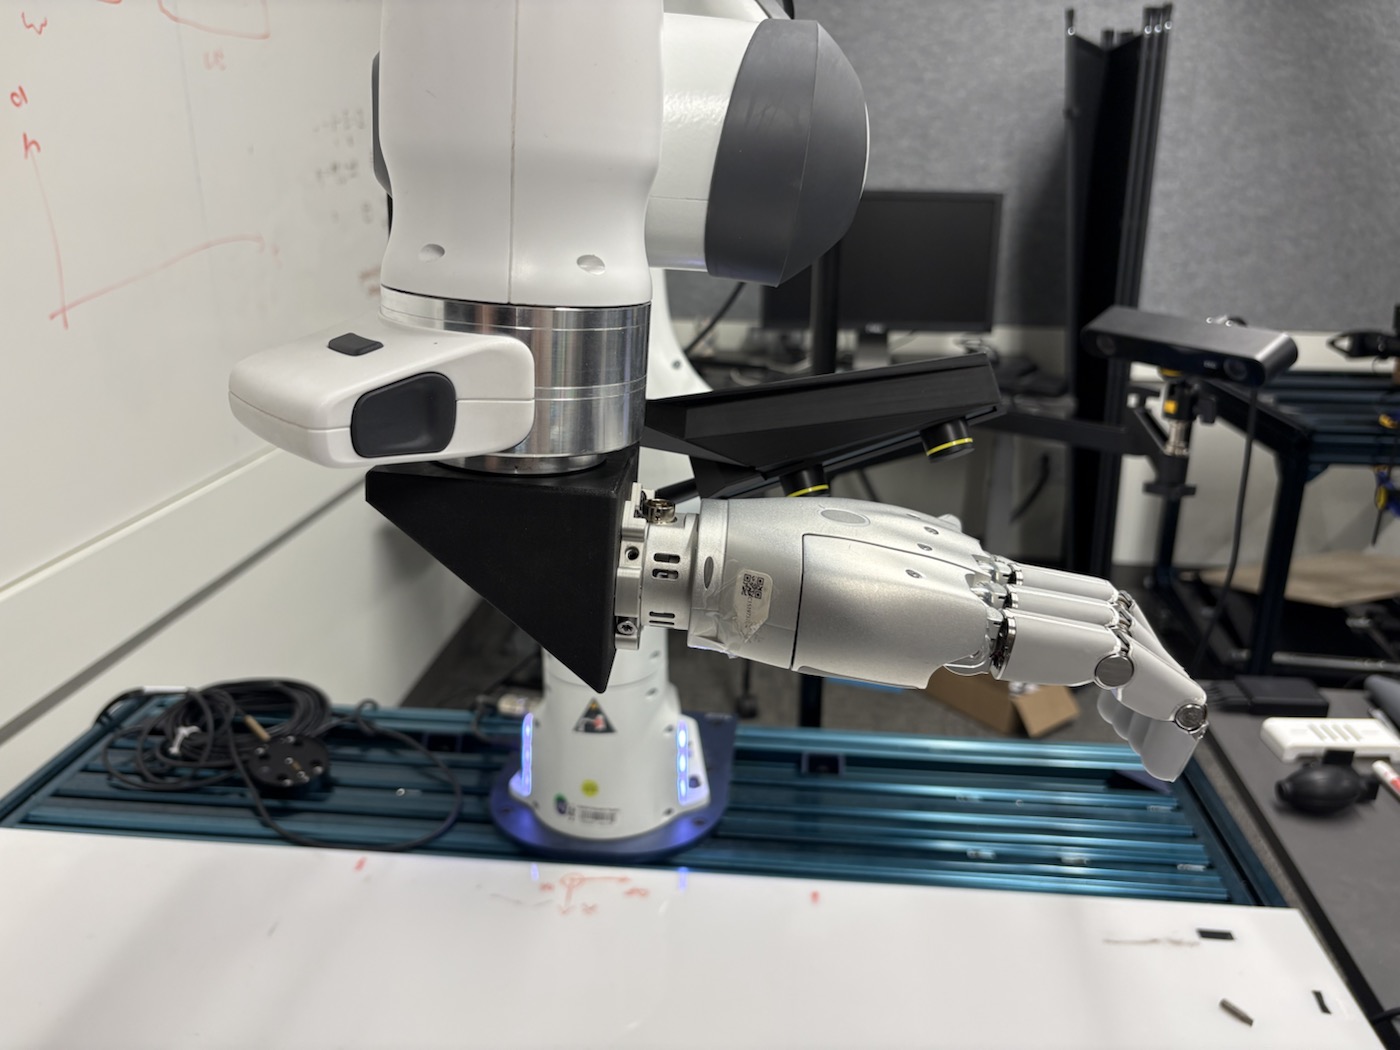
Install the right Sharpa hand on the angled adapter, with the dedicated extended camera bracket.
01 / Start from working DROID
Your DROID installation must already work: Franka arm, real-time NUC, workstation, wrist and external ZED cameras, networking and robot control. This guide covers the conversion to Cloak, not initial DROID installation. Refer to the DROID documentation for that baseline.
02 / Parts and mounting
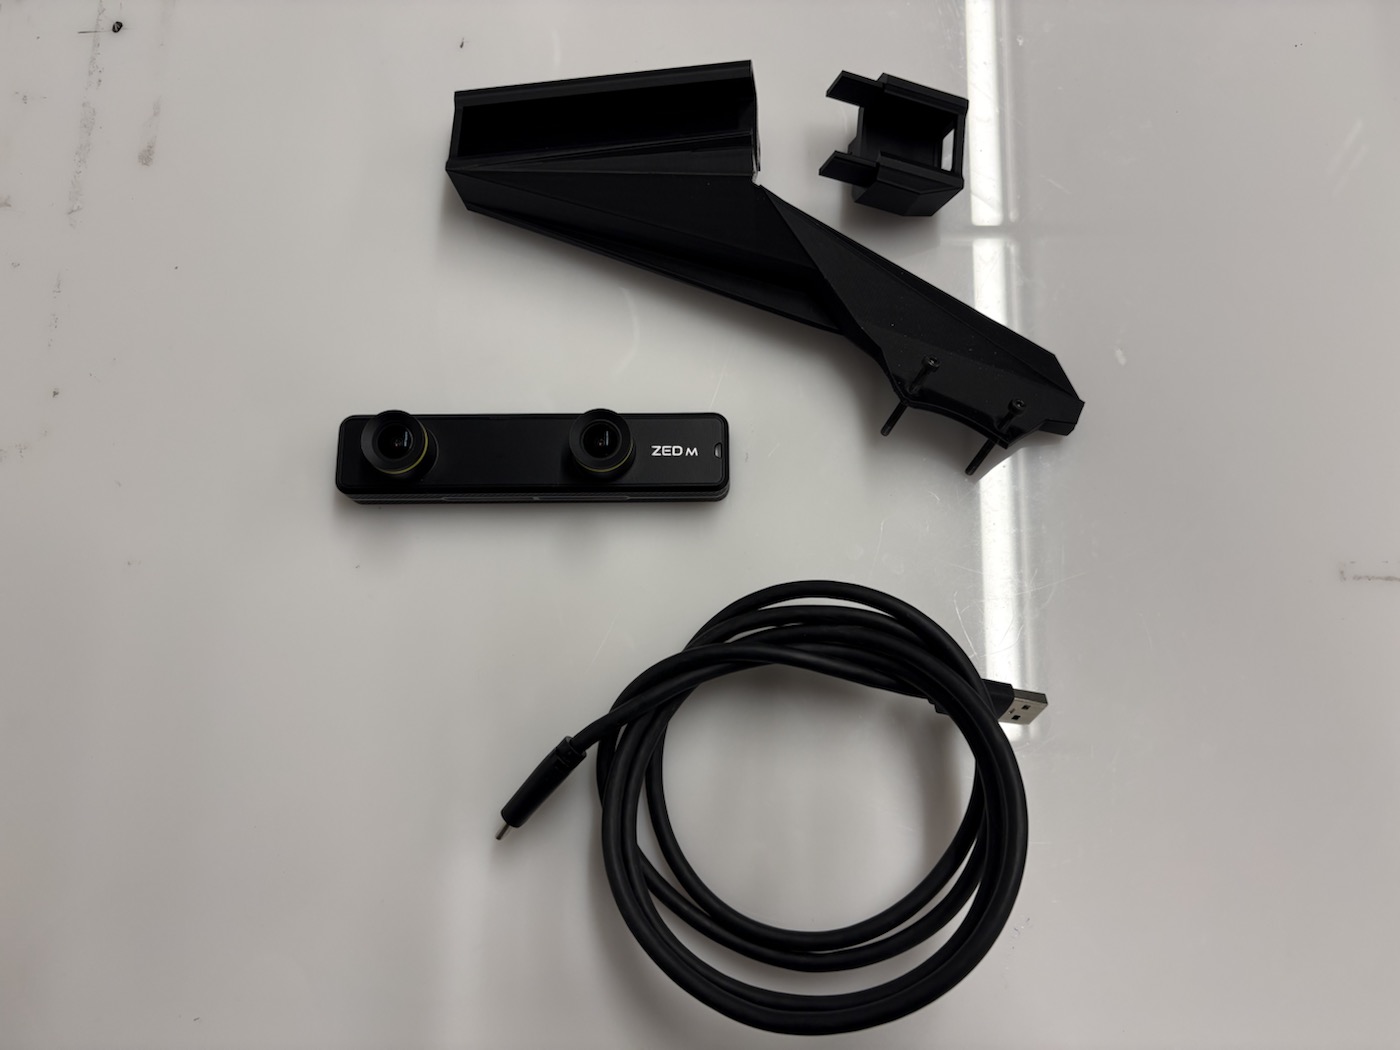
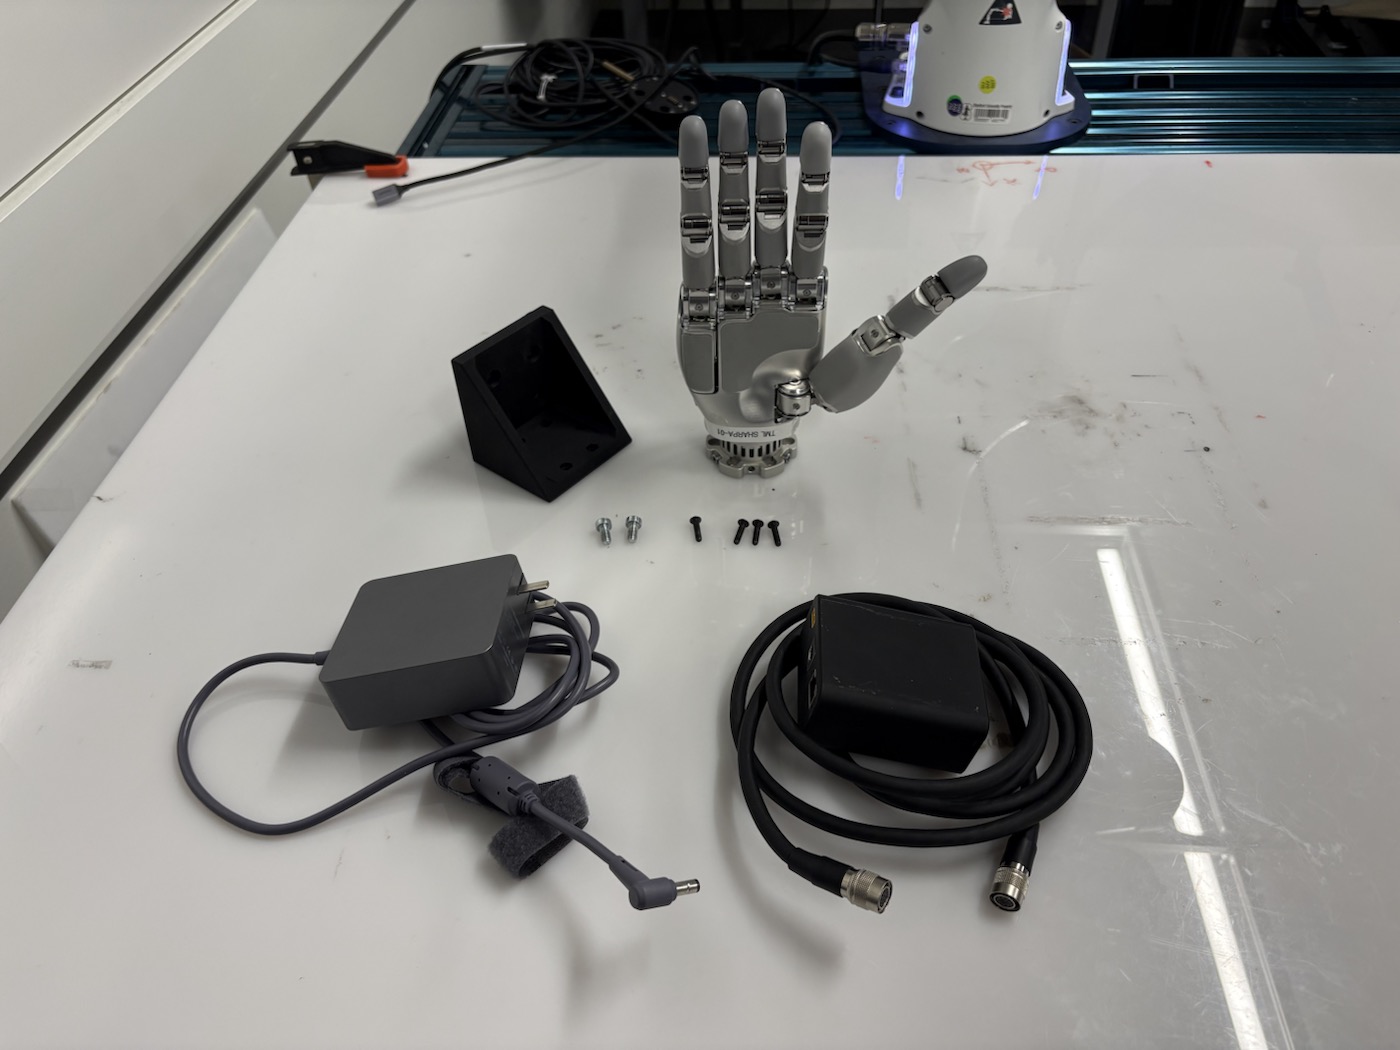
Right Sharpa hand, angled adapter and matched fasteners; dedicated Sharpa camera bracket and retainer; ZED Mini and USB cable; Sharpa power supply, interface and data cable; existing external ZED camera.
STL downloads
These files are included in the repository under docs/setup/stl/. Import them as millimeters, at 100% scale.
| Part | Preview | Quantity |
|---|---|---|
| Camera mount - part 1 | 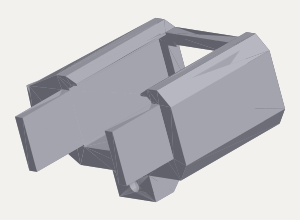 | 1 |
| Camera mount - part 2 | 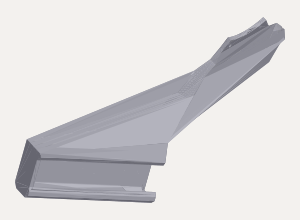 | 1 |
| Hand adapter | 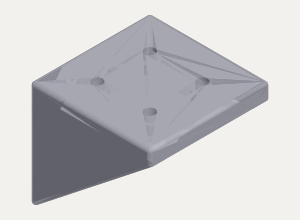 | 1 |
Part 1 closes the camera holder; part 2 attaches it to the robot. Print one of each. Check the slicer preview before printing.
Fasteners
Camera holder: one M3 × 10 mm screw and an M3 nut. Camera bracket to wrist: two M3 × 30 mm screws. Reuse these fasteners from your existing DROID camera installation. The DROID assembly guide specifies these lengths. The M3 size is inferred from the 3.0 mm screw holes in the DROID mount STL files and the confirmed use of the same thread size for both connections.
Sharpa hand to angled adapter: four M4 × 16 mm screws. Adapter to Franka flange: four M6 × 10 mm screws (the DROID Robotiq coupling-to-flange fasteners). See the DROID mounting instructions for the flange fasteners.
Mounting holes and orientation
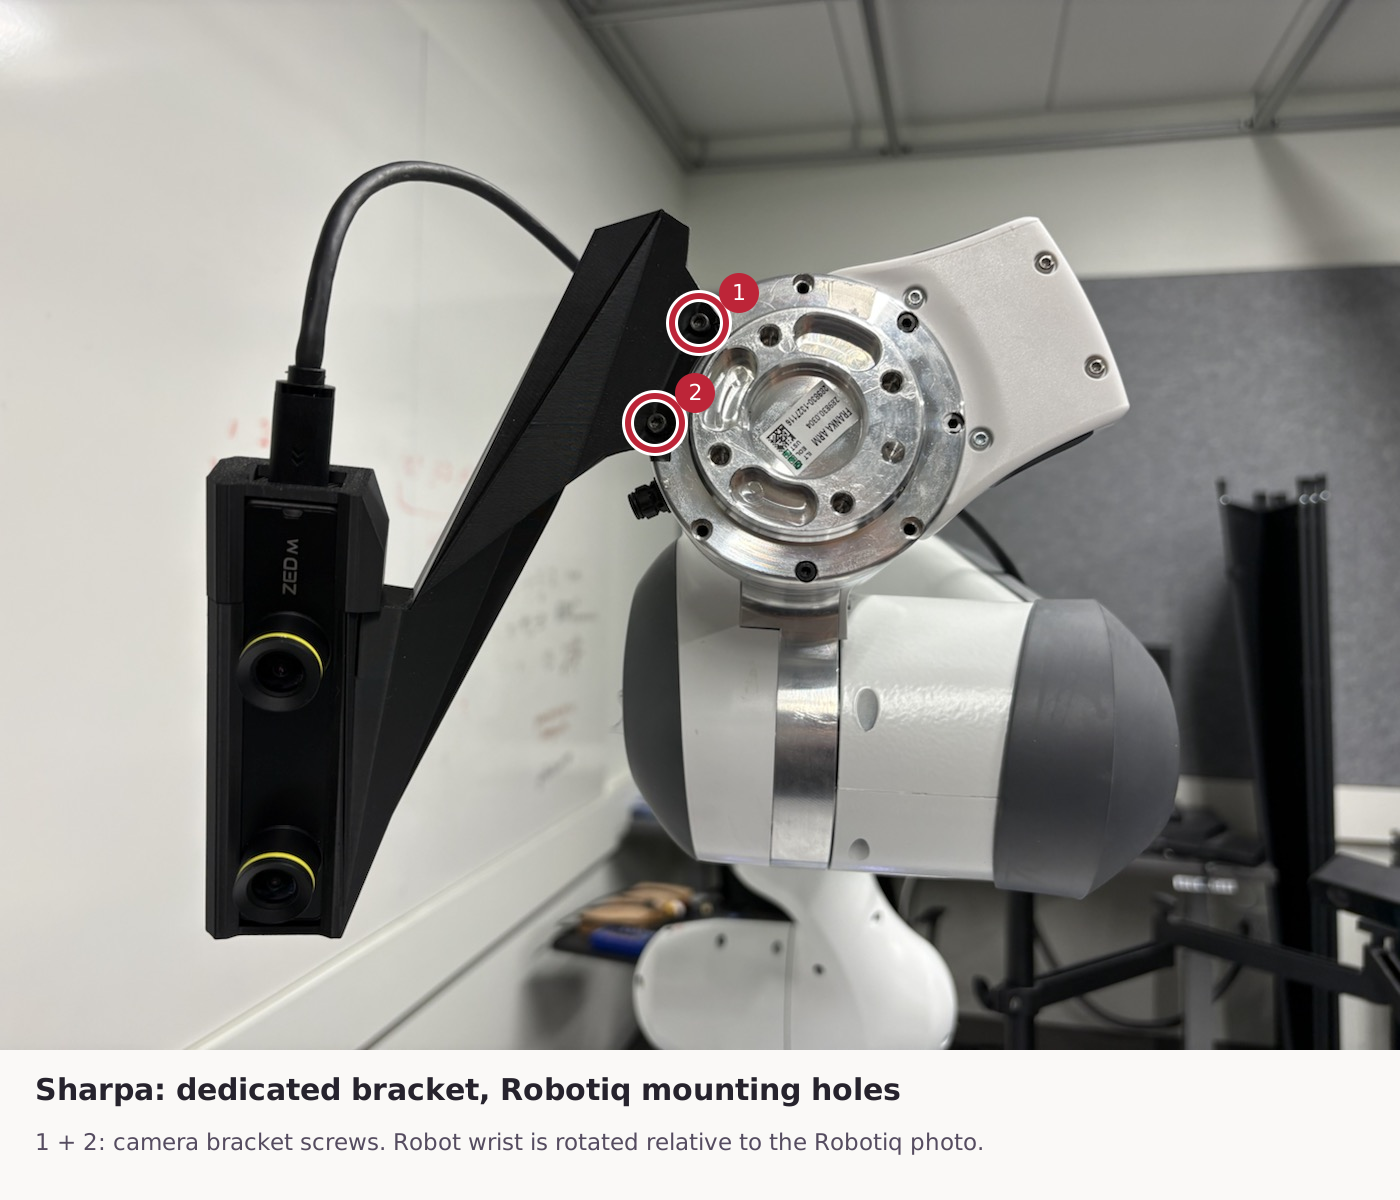
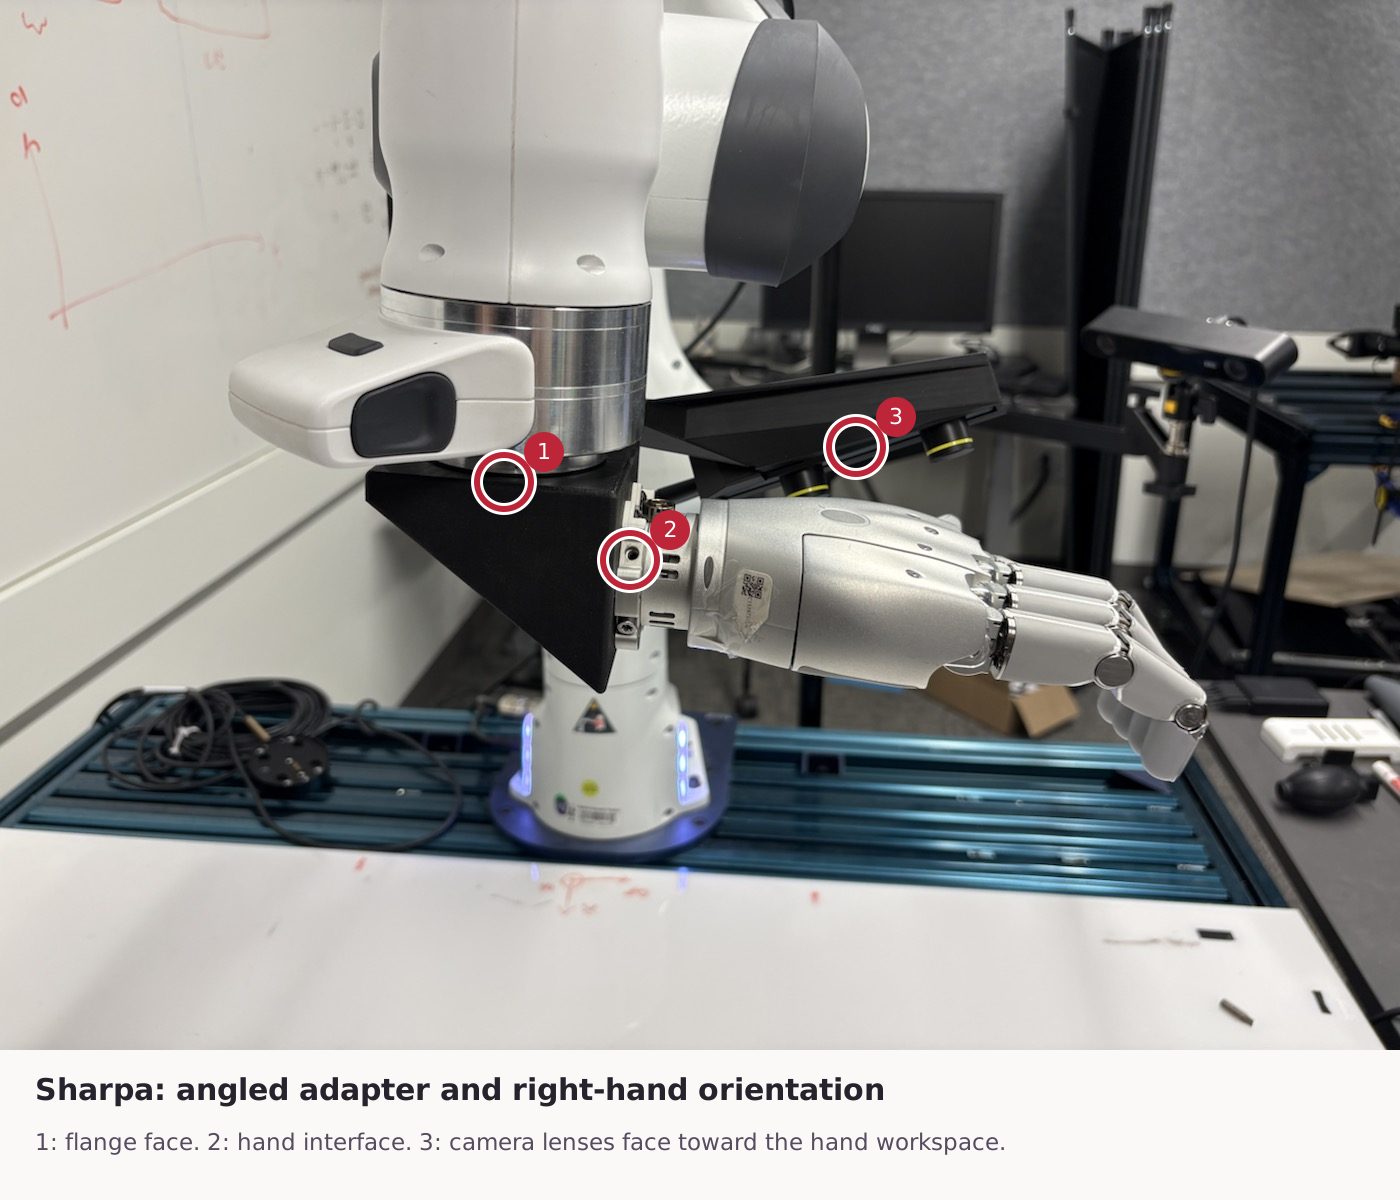
- Quit the client and stop the controller. Follow the normal powered-down hardware-change procedure and remove the previous end effector and camera mount.
- Install the dedicated Sharpa camera bracket. It uses the same robot-side holes as the Robotiq mount, but is a different printed part. Use the photos for bracket orientation and camera seating.
- Install the angled adapter and right hand in the illustrated orientation. The hand extends sideways relative to the flange. Do not substitute the straight adapter or a left hand.
- Connect the hand to its power/data interface and workstation, and the camera by USB. Secure loose cable loops while allowing wrist rotation. Keep cables out of the finger travel.
03 / Configure Franka Desk
Download sharpa_angled.json from deployment/endeffector_configs/ in the repository to the computer where you use Franka Desk. On GitHub, use the file’s Download raw file button.
- Open Settings → End-effector (1).
- Select Other in the end-effector menu (2).
- Click Upload (3), choose
sharpa_angled.jsonin the file picker, and confirm. - Click Apply (4). Check that the button changes to Applied and the values-differ warnings disappear.
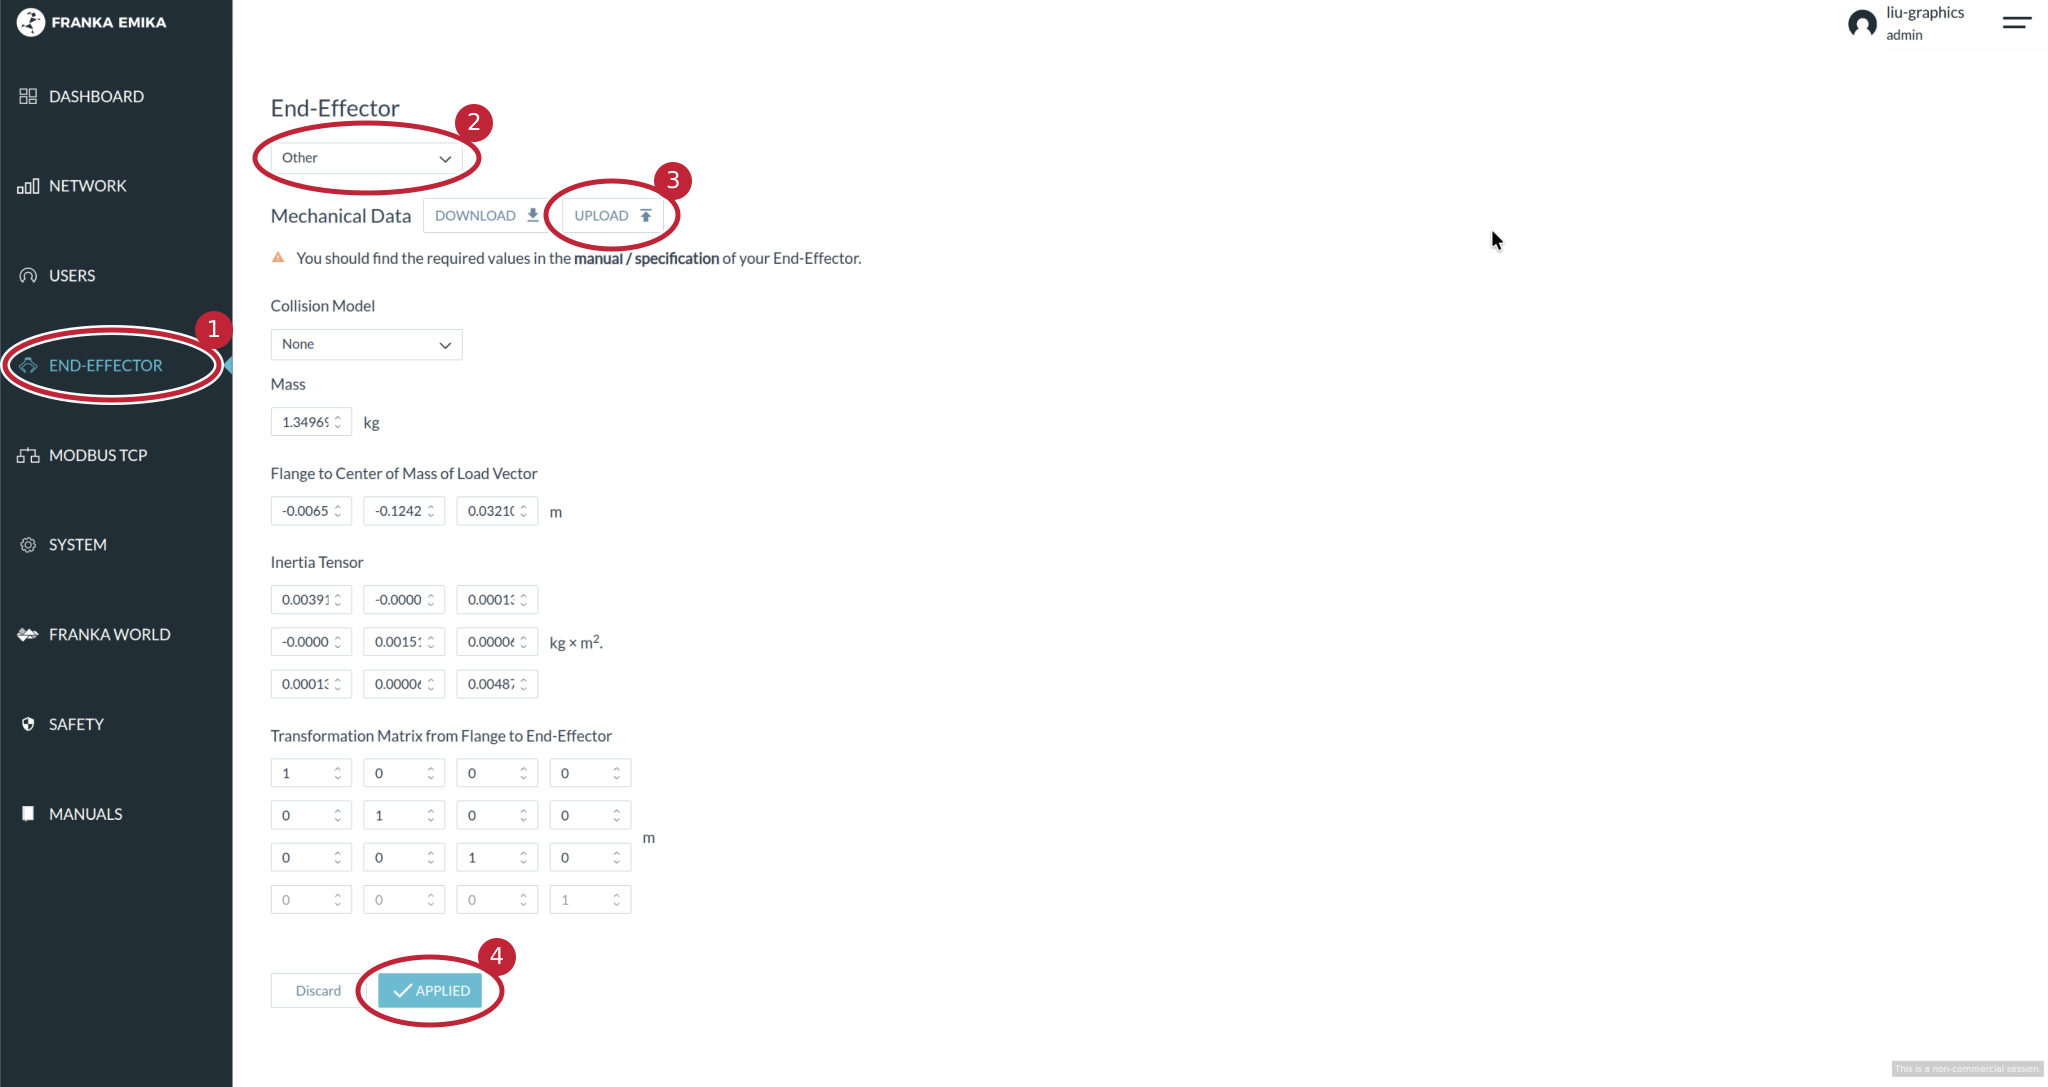
Use the supplied file for the pictured assembly. Reopen the page to confirm the settings were saved.
04 / Workstation and checkpoint
On the GPU workstation, use the Cloak checkout that contains these setup scripts.
git clone https://github.com/Stanford-TML/cloak.git
cd cloak
uv sync --group client --group dev
# Create settings only when they do not already exist.
[ -f .env ] || cp .env.example .env
Install the ZED SDK
If ZED SDK 5.1 is already installed, continue to the camera check below. Otherwise, download the 5.1 installer matching your Ubuntu and CUDA versions from the Stereolabs downloads page. Use 5.1 to match this repository’s Python API dependency.
Follow the Linux installation instructions: install zstd, give the downloaded installer execute permission, then run it. Keep the camera tools and AI module installed; Cloak uses neural depth. Restart the workstation when installation is complete.
The uv sync command above installs the project’s Python camera API. Installing the SDK alone does not install it into the Cloak environment.
Find the camera serial numbers
Connect the wrist and external cameras to the workstation. Close any program currently using them, then run:
/usr/local/zed/tools/ZED_Explorer --allThe output lists each camera’s model and S/N. Use the wrist camera’s S/N for WRIST_CAMERA_ID and the external camera’s S/N for EXTERNAL_CAMERA_ID. Enter only the digits, not the camera index or /dev/video path.
To confirm which view belongs to each camera, open ZED Explorer and select it from the camera menu:
/usr/local/zed/tools/ZED_ExplorerCheck the live image and note its serial number. If the two cameras are hard to distinguish, connect one at a time while no robot client is running. Close ZED Explorer before calibration or deployment so it releases the cameras. See Stereolabs’ serial-number instructions.
Configure the workstation
Enter your addresses and camera serial numbers in .env:
EMBODIMENT=sharpa
CLOAK_NUC_IP=<your-nuc-ip>
WRIST_CAMERA_ID=<wrist-zed-serial>
EXTERNAL_CAMERA_ID=<external-zed-serial>
WRIST_CAM_LENS=left
POLICY_HOST=127.0.0.1
POLICY_PORT=8000
CONFIG=pi05_full_droid_finetune_v3-1_ik
CHECKPOINT_DIR=/absolute/path/to/cloak_VLA/100000
DEBUG_MASKS=true
Replace every angle-bracket placeholder before running. Enter camera serial numbers without the SN prefix. Use 127.0.0.1 only when the policy server runs on the same workstation as the client.
Download Cloak-VLA from the checkpoint folder. Reuse an existing download. Point at the checkpoint directory containing params/ and assets/, not the ZIP file. This guide does not require training.
Sharpa SDK and network
Obtain the vendor SDK and place SharpaWaveSDK_4.3.4/ at the repository root. Its Python extension must match the workstation Python version. Connect the right hand to the workstation network used by the SDK. The NUC runs the arm only; the workstation SDK controls the hand.
The current policy uses camera and joint feedback. Tactile reception is not required by it and is not covered by this guide. A tactile bind-address warning must be resolved separately if you need tactile data.
05 / Start the NUC bridge
Keep the existing working DROID container available for rollback. Copy deployment/nuc/ into a separate directory on the NUC. Review deployment/nuc/backend-manifest.json in the same checkout and the robot configuration for your arm and libfranka version before starting a replacement.
Build against an existing verified DROID image compatible with your arm and libfranka version. The historical registry tag is not publicly retrievable in our check; use your working DROID image and verify the dependencies in the NUC package reference. A fresh base-image build has not been validated.
# On the NUC, in the copied deployment/nuc directory:
docker build --build-arg BASE_IMAGE=<verified-droid-base> -t cloak-nuc:local .
export CLOAK_NUC_IMAGE=cloak-nuc:local
export ROBOT_IP=<arm-controller-ip>
docker compose config
# Quit any robot client, then stop the existing controller container first.
docker stop <existing-controller-container>
docker compose up -d
docker compose logs -f
The bridge listens on port 4242; controller processes start when the workstation requests them. For Sharpa setup on Franka, the bridge starts the arm without a parallel-gripper driver; the workstation SDK connects to the right Sharpa hand.
Never run both controller containers against the robot at once. To roll back, quit the client, stop the Cloak service with docker compose stop, then restart the preserved original container. The workstation environment is not installed inside the NUC container.
06 / Calibrate the wrist camera
Silhouette Calibration estimates the wrist camera extrinsics from images captured while the arm moves through several poses. Clear the workspace before starting:
bash scripts/calibrate_wrist_camera.sh --embodiment sharpaThe outputs are a calibration file, deployment/calibration/calibration_info_sharpa.json, and a mask visualization, scratch/wrist_calibration/sharpa/mask_overlay_sharpa.png. Deployment loads the calibration automatically. Inspect the overlay to confirm that the silhouette aligns with the end effector.

To fit an existing capture without moving the robot:
bash scripts/calibrate_wrist_camera.sh --embodiment sharpa --captures scratch/wrist_calibration/sharpaRecalibrate after changing the camera mount or orientation.
07 / Run a policy
Start the policy server on the GPU workstation:
bash scripts/serve_policy.sh --embodiment sharpaOnce the server is ready, start the robot client in another terminal:
bash scripts/deploy_policy.sh --embodiment sharpaKeep the arm’s home path clear during startup and reset. Check end-effector connectivity before entering a task instruction, then supervise the rollout. The client provides controls for stopping and saving the episode.
08 / Save and inspect the output
With DEBUG_MASKS=true set before starting the server, answer y to “Save video?” and enter a descriptive label. Outputs appear in test_videos/:
| File | Contents |
|---|---|
<episode>.mp4 | External and wrist RGB views. |
<episode>_mask.mp4 | Four panels: external RGB, wrist RGB, inference wrist image with green mask, binary mask. |
<episode>_masks.npz | Boolean masks, paired wrist images, control-step indices and nominal FPS. |
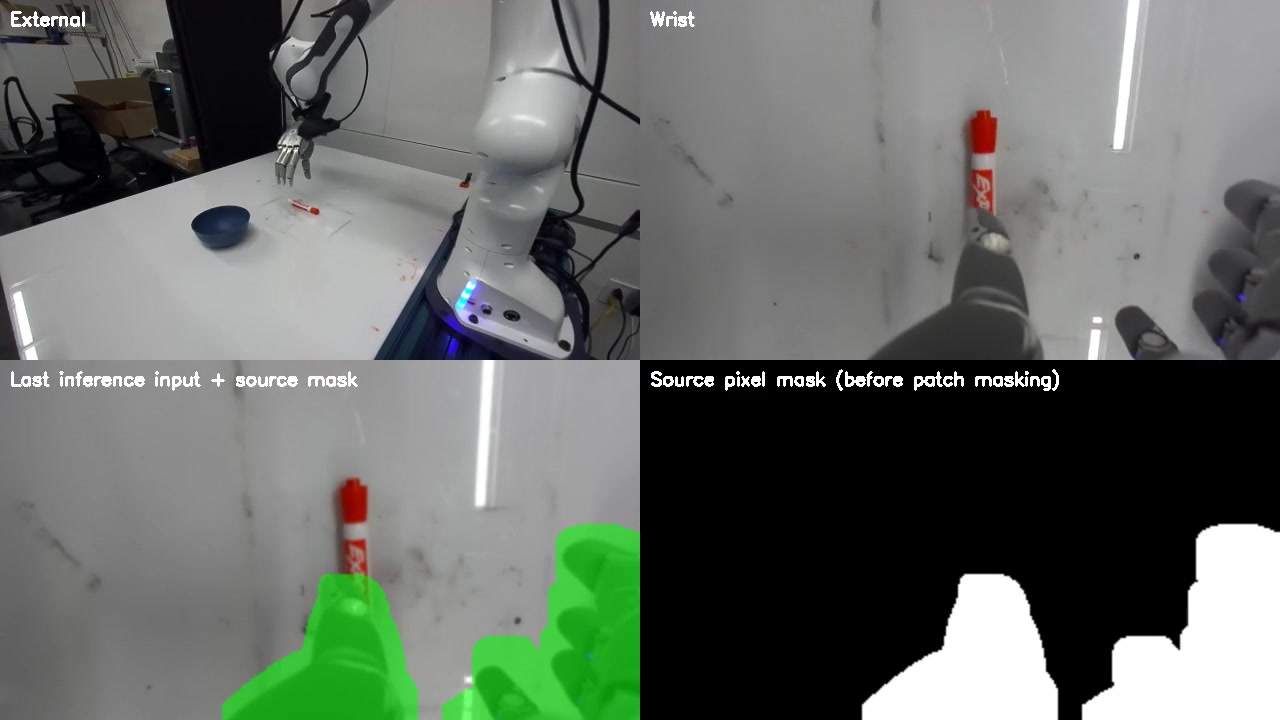
Masks update at policy queries. Between queries, the lower panels hold the matching inference image and mask, so they can lag the current camera views above. These are source pixel masks, not the model's final token grid. Playback uses nominal 15 Hz; inference pauses are not encoded as wall-clock timing.
If no mask files appear, check that the server was restarted after enabling DEBUG_MASKS. The client’s --debug option uses mock hardware and is not the mask-recording switch.
09 / Troubleshooting
Controller timeout, reflex stop or communication fault
Stop the run and inspect the NUC logs before retrying. Check that only one bridge is running, that the robot is ready for external control, and that the real-time network/backend is compatible. Do not treat automatic error recovery as proof that the underlying fault is resolved.
Mask does not follow the hand
Check embodiment, camera serial, lens and mount orientation. Rerun silhouette calibration after any mounting change. Inspect several poses before trusting the result.
Hand feedback or grasping is wrong
At the deployment instruction prompt, with the empty hand clear, type g and press Enter to check hand connectivity and motion. It commands the hand to close and reopen. Confirm both movements before entering a task. If it does not respond, check power, connectors and the hand driver. Confirm the right-hand SDK connection on the workstation and restart the policy server with scripts/serve_policy.sh so fixed-hand IK is enabled. All fingers, including the pinky, should follow the same hand interpolation as g.